[ General diagnosis · 7 min read ]
Step-by-step Elektroblock diagnosis with a multimeter
Before removing the Elektroblock from the motorhome and sending it for repair, there are five multimeter measurements that locate 80% of typical faults. This guide shows you which ones, where to probe and what values to expect on the EBL 99, 101, 208, 220 and 269.
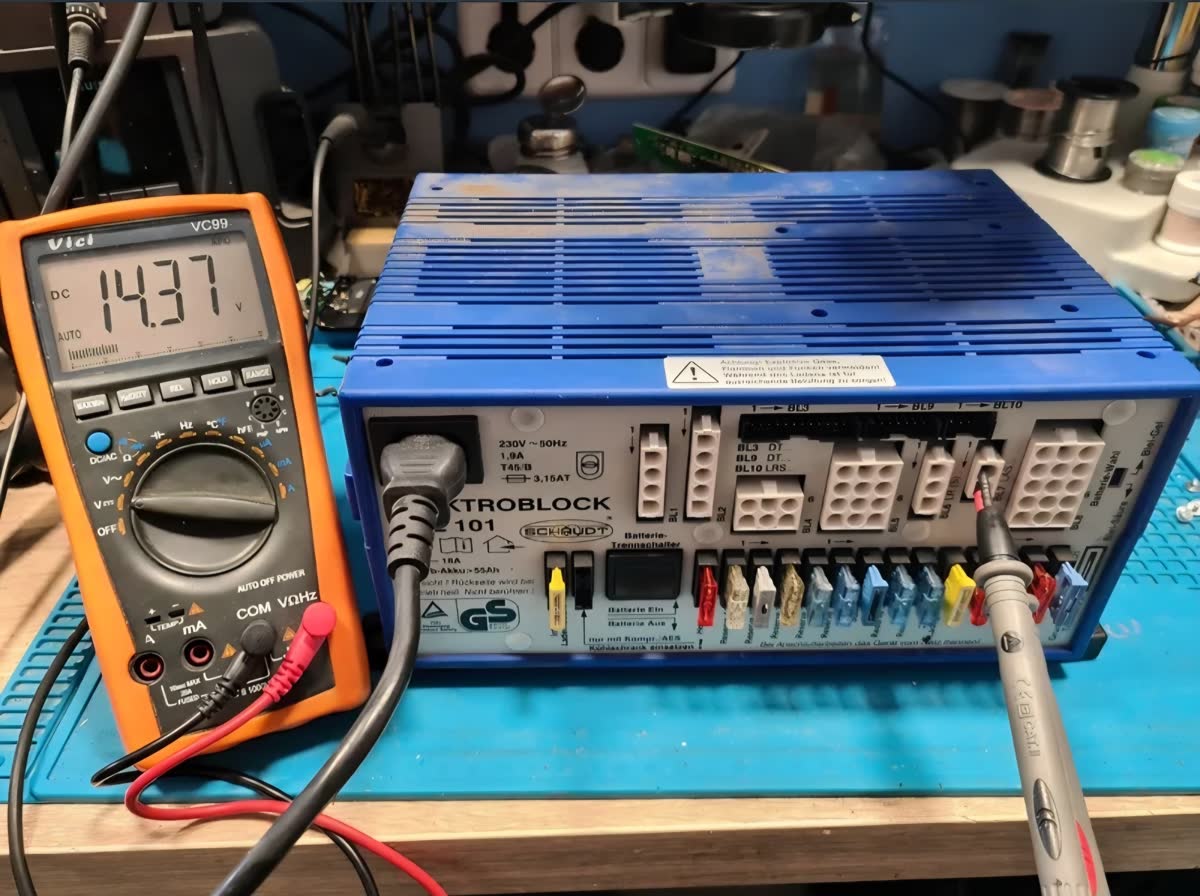
What you need
Any multimeter capable of measuring DC voltage up to 20 V, AC voltage up to 300 V, DC current up to 10 A, resistance in ohms, and continuity/diode mode. A €40 Vici VC99 or an entry-level Fluke is enough. You don’t need an oscilloscope for the first-level diagnosis.
For safety: when the EBL is plugged into 230 V mains or when measuring on the mains side, treat it like any live circuit. The internal capacitor bank can retain a lethal charge for minutes after unplugging.
Measurement 1: auxiliary battery resting voltage
With the motorhome unplugged from mains, engine off, all consumers off, 12 hours after any charging. Measure in DC at the auxiliary battery terminals.
- Expected: 12.6-12.8 V healthy, 12.0-12.4 V discharged but OK, under 11.8 V = battery sulphated or dead.
A dead battery mimics an EBL failure. Always start here.
Measurement 2: EBL output voltage under 230 V mains
Plug the motorhome into mains, wait 2 minutes for the charger to engage. Measure in DC between the auxiliary battery positive terminal and chassis ground.
- Expected: 13.8-14.4 V (depending on EBL model and battery type setting).
- 12 V or lower: the internal charger isn’t delivering. See not charging on 220 V.
- Over 14.5 V: regulator failure. Risk to the battery. Disconnect immediately.
Measurement 3: D+ signal from the alternator
Start the engine and let it idle. With the multimeter in DC, probe the D+ terminal of the alternator (usually a small spade near the main output). Then probe the D+ pin at the EBL side of the Block 2 connector.
- Expected at alternator: 13.8-14.4 V.
- Expected at EBL: 12-14 V (the thin wire causes a small voltage drop).
- Alternator OK but EBL reads 0 V: broken wire or blown 2 A fuse in the engine bay.
See alternator D+ signal for the full procedure.
Measurement 4: coupling relay coil
Only if you’ve already removed the EBL from the vehicle and discharged the capacitors. In ohms, between the two coil pins of the Song Chuan 897-1AH-C1 relay.
- Expected: 70-90 Ω.
- 0 Ω or infinite: coil is dead. See coupling relay 70 A.
Measurement 5: internal fuse continuity
Remove the EBL’s cover (motorhome unplugged, capacitors discharged). Locate the T 3.15 AT glass fuse in the 230 V input section. Measure in continuity.
- Expected: continuous beep (0 Ω).
- No continuity: fuse blown. If it blows again after replacement, see internal fuse blows.
Decision table
| Measurement | Reading | Next step |
|---|---|---|
| Battery at rest | < 11.8 V | Replace battery, re-test |
| EBL output on mains | 0-12 V | Internal charger down |
| EBL output on mains | > 14.5 V | Regulator fault, disconnect |
| D+ at EBL | 0 V (alternator OK) | 2 A fuse in engine bay |
| Coupling relay coil | 0 Ω / infinite | Relay replacement |
| Internal fuse | No continuity | Replace once; if blows, deeper fault |
When to send to the workshop
If measurements 2, 3 or 5 show abnormal values, the next step is a bench diagnosis with lab PSU and oscilloscope. In my workshop that’s free; you only pay the final repair.
Related guides
- Auxiliary battery not charging — full fault matrix.
- Not charging on 220 V — 5-point charger diagnosis.
- Alternator D+ signal — when the engine side isn’t reaching the EBL.
Read next
Other related faults.
Charging diagnosis
Elektroblock not charging the auxiliary battery
If your Schaudt Elektroblock has stopped charging the living-area battery —neither from 230 V mains, nor from the alternator, nor from the solar panel— the fault is almost always in one of these seven points. This guide shows you how to diagnose which before dismantling anything.
Read guide →
Charging diagnosis
Elektroblock not charging when plugged into 220 V
You plug the motorhome into the campsite 230 V pedestal and the auxiliary battery keeps dropping. The green LED on the LT panel doesn't come on or flickers oddly. This guide covers what to check before sending the Elektroblock for repair, the most likely internal faults, and how much each one costs.
Read guide →
Signal diagnosis
Alternator D+ signal not reaching the Elektroblock
Your motorhome charges perfectly on 230 V mains but when driving on the road the auxiliary battery doesn't go up. The problem is almost always the alternator D+ signal not reaching the Elektroblock. Here's the 10-minute diagnosis.
Read guide →
Next step
Time to repair? Free diagnosis by WhatsApp.
Send me the exact Elektroblock model and a photo of the LT panel. I'll confirm whether it's a common fault, the indicative price and how to pack it.
Message on WhatsApp